Wednesday, April 25, 2018

Where AMOS Fits In

In contrast to last week's progress, this week seemed a lot slower. I was hoping to get the BoatCaptain PC software ported over to iOS to make it easier to control the boat from a kayak on the water. I was also hoping to integrate GPS and navigation software into BoatCaptain. Unfortunately I only partly succeeded in porting the software over to iOS and didn't even start the GPS / navigation integration. Here is a screenshot of the working version of BoatCaptain on iOS:


The code for controlling the boat over a network interface works fine, but it's the Bluetooth connectivity stuff that is giving me lots of grief. Unfortunately Apple doesn't make it simple for developers to integrate Bluetooth into their software. Apple's "CoreBluetooth" libraries for low energy Bluetooth devices look promising, but they are quite a bit different than any other Bluetooth software I have done in  the past for Android or the PC, so may require a lot of time to figure out. At this point I'm considering just setting it aside and moving on to other things. 

The North American cell modem that was back ordered and scheduled to ship this week got delayed again, so I canceled that order and decided to look for an alternative. Similar standalone cell modems seemed to be priced at ~ $300 or more, but something like a Bell or Rogers turbo stick (for getting cell data on a tablet or laptop) were less than $100, although they required signing  up for some sort of plan which I didn't look into. Since I already had the SIM card with 100 MBytes / month of data from Bell, I decided to just get an Android smart phone for a little over $100. It can be added to the boat for cell / data connectivity, communicating to the Raspberry Pi Compute module over Bluetooth. It will also afford some gigabytes of data storage.

There was a steering committee report released recently to the New Brunswick government that provides a good summary of the testing and results that have been accomplished in the Parlee Beach and surrounding area. The report itself is available here: http://www2.gnb.ca/content/dam/gnb/Departments/eco-bce/Promo/Parlee_Beach/pdfs/parlee_beach_water_quality_finalreport-e.pdf  
The results indicated that the water quality at the beach location was nearly always within the safe limits specified in the Canadian Recreational Water Quality Guidelines (https://www.canada.ca/en/health-canada/services/publications/healthy-living/guidelines-canadian-recreational-water-quality-third-edition.html). The times when the limits were exceeded seemed to be strongly correlated with wind direction (higher bacteria concentrations were measured at the beach when the wind was from the north or northwest), and possibly some weaker correlation with tides, rainfall, and beach traffic. It was also interesting to note that the bacteria levels measured in the watershed around Shediac Bay were considerably higher than those measured at the beach itself. That could be why winds from the north or northwest resulted in higher concentrations of bacteria at the beach: the bacteria from the watershed were pushed back to the beach by the wind.

So where does AMOS fit in with the testing that has been done so far and the recommendations for future work that the steering committee report described? The second recommendation that the report listed was to "Apply the hydrodynamic model to validate the transport paths related to actual discharges into the Bay (concentrations, volumes, weather conditions)." In addition to collecting samples at various locations in the Bay itself or in the surrounding rivers and streams, AMOS could be allowed to drift at various times and locations in order to estimate probable transport directions that bacteria might follow due to winds, tides, and currents. With a relatively rapid sample evaluation time (less than 12 hours vs. the current 48 hours) this might be able to provide a reasonable estimate of beach water quality, thereby accomplishing the 6th recommendation of the report: "Develop and validate a tool for predicting water quality, based on relevant environmental and meteorological data, which could be used by the Medical Officer of Health (MOH) to issue “No Swimming Advisories” at Parlee Beach. A predictive tool would address concerns with the 48-hour delay related to analyzing water quality samples". Of course, even better than a predictive tool would be a device for obtaining real-time bacteria concentrations on an ongoing, continuous basis. That is the long-term goal of AMOS.

Wednesday, April 18, 2018

Bluetooth and Blue Skies

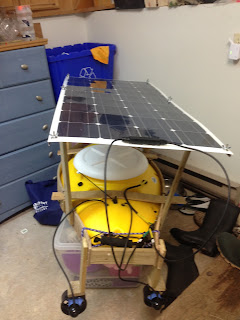
A lot of progress was made this past week. After printing several parts for the solar panel framework and bolting them together, it became readily apparent that this method of construction would not result in something rigid enough to work well. So I visited Home Depot and found some 8 foot long bronze tile edge things that looked like they would be suitably stiff and lightweight when bolted to the solar panel. Here is the result with some more scrap wood from the garage added to connect it to the rest of the framework:


The solar panel is elevated above the boat significantly more than it will be in the final design; this is necessary for now so that there is lots of room to stick my big head inside the hull and make electronics modifications. The panel is held to the framework with 6 bolts and wingnuts, so isn't difficult to remove should the need ever arise. Also, I ordered some neat little waterproof connectors (~ $1 each from Amazon) and am using one of them for the solar panel wiring:


Perhaps in a future revision the solar panel could be much closer to the boat and have a sort of hinge / latch mechanism for making it easy to get inside the hull.

The client / server software that I began the week before is also coming along well. The server resides on the boat and waits for incoming network and / or Bluetooth connections. The client (for now) is just a quick and dirty PC program (called "BoatCaptain") that lets you connect over the network (WiFi at this point) or Bluetooth, and has 4 buttons for controlling propeller speed and direction:


Over time, this will expand to include GPS location, magnetic heading, temperature readings, battery voltage, route planning, sample collection, etc. Also, I would like to have a mobile version as well, since it can be tricky to kayak and work a laptop at the same time.

Our recent rainy weather has abated this morning and I just noticed that there is a relatively deep section of the stream bordering our neighbour's property that is free of ice, so I think it's time for a field test...

EDIT: And here is the video of the first field test: https://www.youtube.com/watch?v=H5xzWFsAKhc

Wednesday, April 11, 2018

Ready For Europe

The 4 volt power supply for the cell modem arrived last week, so on Friday night I soldered it up to the cell modem and connected it to the 5 volts from the new 7-port USB hub which had also recently arrived. The documentation for the 4 volt supply claimed that there were two 4 volt output pins on the little circuit board, so I picked one of them, but after an hour or so of frustration realized that only one of the output pins seemed to be functional. Not sure if that was a fault of the documentation or the board itself, but based on the remainder of the documentation I suspect the former. The documentation for the power supply and cell modem are scattered throughout a number of places on this site: https://itbrainpower.net/. Personally, I much prefer having a single product PDF, rather than having to flip through multiple pages on the web. It just seems so much easier to find what you need later on, if you can open that one document every time.

So once the correct 4 volt output was connected to the cell modem, some LEDs flickered on, and when the power button on the cell modem was pressed, a green light flashed on and off ~ every 1.5 seconds. Something in the documentation indicated that this was as it should be. I then downloaded and installed the Windows drivers, thinking that it might be easier to test out in Windows and confirm that it was working. Indeed a number of new serial COM ports showed up in Device Manager, but the test program the documentation referred to for Windows was not available, and did not seem to be readily available on the Internet. Oh well, back to the Pi for testing then. After a few hours of careful reading and searching, I was able to find out how to correctly (I think) set the Compute Module for use with the modem.  This involved specifying the Bell APN information, and downloading some Python serial libraries to work with the modem sample code. Running the sample code appeared promising at first, as it found the chip device number and SIM card ID, but it was unable to establish any sort of a wireless signal, and did not actually appear to make any sort of wireless connection to the Bell network.

Looking through my purchase records, it turns out that I actually bought a cell modem intended for Europe. So I'm guessing that it works at 900 MHz / 1800 MHz, instead of the frequencies used in North America (850 MHz / 1900 MHz). There is a North American model available, so I ordered it and should have it in a couple of weeks. Hopefully that is the only other obstacle remaining before getting a working cell connection. Maybe the European modem will be useful someday if I ever sell anything overseas!

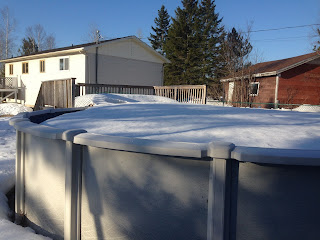
In the meantime, I can use WiFi for network connectivity software and testing purposes. I'm still working on some client / server software for communications between AMOS and a PC (or phone) and hope to have a simple version of it ready before the massive block of snow and ice in our pool melts. I noticed that there are large sections of the St. John River that are free from ice, but I'm too nervous to do any emergency kayaking at this time of year :-).


Tuesday, April 3, 2018

It's All About The Printing

The 3D printer showed up last Thursday, so I dove into the poorly translated instructions and got to work trying to assemble all 300 or so pieces of it. For the most part, I was able to understand the intent of the instructions, but there were a few instances where things were unclear, or just didn't seem to make sense. For these, I found a pretty good video on YouTube that was able to fill in the gaps.

Although others claimed to have assembled the printer in about 6 hours, I'm quite sure that it took me at least 12 hours. I guess you could say that I was being careful. Finally on Easter Sunday I had it all put together, installed and configured the software, read through the user guide, and was ready to go. The printer only came with a few grams of filament, so I didn't want to waste any time on the example models that came with the software, and instead opted to build my own using openSCAD (http://www.openscad.org/). Since the cable penetrators that I bought to go through the hull of the boat were too short, and I wasn't able to find any online that were long enough (stem needs to be ~ 1.5 inches to get through the insulation) I thought it would be a good idea to make my own. openSCAD is pretty slick, especially if you're used to scripting or programming. I was able to make a simple function call to create a metric M16 screw, and then a 2nd function call to create a hollow 8 mm hole down the middle of it. The model looked great! I then exported to an STL file, brought it into some 3D printing software (Cura), re-saved it as a GCODE file, and then issued the command to start printing.

Before all this, I had eye-balled the heating bed to make sure that it appeared to be level and that the nozzle head was pretty close to the bed surface. Rookie mistake. My first print was a strange jumble of filament in the center of the bed that got pushed around randomly by the nozzle head. So I used the recommended technique of placing a sheet of paper on the bed and moving the head over the surface of the paper to see that it just barely touched everywhere. This seemed to help, although my next two prints (of two separate models on different parts of the bed) also failed... in retrospect I think this failure might have been due to a position error, caused by one of the belts being too loose. Eventually, after midnight I was able to get a not too bad looking penetrator screw. It looked like it was slightly squashed though, again probably due to the loose belt. Tightening the belt the next day seemed to result in better print symmetry.

On Monday I moved the printer out into the playhouse:


My first couple prints out there did not go particularly well. Tightening the belt improved the symmetry of the modeled screw, but the parts of the screw that were more than about an inch from the heating bed were fairly weak, and tended to tear apart when stressed or torqued with a nut. I think it might have been too cold (~ 10 deg C) in the playhouse. So I tried using the printer's own packaging to insulate the printing volume a bit.


This seemed to do the trick, and  I was able to get some better prints, but still not quite strong enough to actually tighten a nut over it. After shortening the threaded section of the screw, and reducing the hole diameter to 6 mm, I was finally able to make something useful:


Now I'm creating models of parts that will make up the framework for holding the solar panel on AMOS. As these are larger parts, they will require about 5 hours each to print... so a little bit longer between iterations!

While waiting for stuff to print, I also started work on a sort of generic server program for AMOS that would allow it to receive TCP/IP or Bluetooth / serial commands from a host controller.

EDIT (April 4, 2018): I think I can dispense with the ridiculous box around the printer; I was able to do a number of good prints today at an ambient temperature of ~ 0 degrees C. Suspending the filament reel from a beam in the ceiling seemed to greatly improve the quality and precision of the prints, as the reel was much more free to rotate, and the filament didn't get snagged on anything.