Sunday, December 10, 2023

Project Quest

 Over the last 6 months, this blog has been sadly neglected. Some bits of work here and there were completed, but none of these bits reached any sort of satisfying conclusion, so writing about them hardly seemed worthwhile. Occasionally, someone does ask what I am working on these days though, so in this blog I will attempt a brief summary.

As the previous blog entry, written at the end of May alluded to, I attempted to create a new type of robotic joint that consisted of electromagnets constructed from soft iron rods and magnet wire, arranged orthogonally to each other, and driven with electric current to move a lightweight, plastic arm with a small permanent magnet fixed to its end. The idea was to have a two degrees of freedom joint, but without any relatively heavy conventional electronic motors to make it work. I had found some theoretical papers on this idea, but no practical implementations. The reason for this soon became apparent: When an electromagnet was activated with current, it would attract the permanent magnet at the end of the plastic rod, but only if the permanent magnet was fairly close to the end of the electromagnet. And once an attractive force was established, the permanent magnet would quickly swing over to the end of the electromagnet, and remain fixed there, even after the current was turned off. At this location, the permanent magnet would have been too far from any other electromagnet to allow it to produce enough attractive force to remove it from its current location. Possibly some different selection of larger diameter soft iron rods for the electromagnet(s) would have worked a bit better, but this would seem to defeat the original goal of making something more lightweight than a conventional electric motor. So the project was cast aside. 

Once summer started, the fine weather inspired me to make some sort of robot that could work outdoors in the sunshine. Robotic boats are fun to work on and test, but a bit time consuming to drive to and from water. Why not create a robot that could function in the backyard, and do something useful like pick up dog poop? There is already a robot that purportedly does this: https://www.housebeautiful.com/lifestyle/kids-pets/a31289426/robot-picks-up-dog-poop/ although so far as I can tell, it is not commercially available yet. It seemed like it would be fun to develop something that uses visual AI to identify dog poop, scoop it up, and place it in a disposal bin of some sort. I figured it would make sense to get some sort of mechanical platform up and running as quickly as possible, so that I could then enjoy the fun part of developing visual AI algorithms. 

Of course, the mundane assembly work for creating a platform occupied the better part of the summer. I used a piece of plywood for the base, a scavenged wireless transmitter from an old AMOS prototype, an Arduino Uno microcontroller and stepper motor driver from an abandoned compass calibration apparatus, a couple of garage door motors and DC motor driver from a previous attempt at making a paddle robot boat, and a worm gear and stepper motor that was scavenged from a broken 3D printer. The wheels were 3D-printed. Here is the ugly result:


Testing it out in the basement wasn't too bad. It would drive around, and the scooper, although perhaps a bit on the small side for our Labrador retriever, could be driven up and down. On the grass however, the robot failed miserably. The large back wheels tended to spin uselessly in our long, wet grass. Possibly if the robot had more weight, and better wheels (lawnmower wheels?) it could have worked better, but by this point the summer was nearly over, and the initial appeal of the project had faded. 

I decided to switch projects again, although for some reason, stuck with a pet-related theme. We have an Apple AirTag for our orange tabby cat, Tiggy. It is very lightweight, and its small coin cell battery is able to power it for about a year before it needs changed. So long as Tiggy is within about 50 m of my phone, or 50 m of someone with an Apple-related product that has location tracking enabled, I can find his location on my phone. The problem however, is that when Tiggy ventures outdoors, he is seldom within range of anyone's Apple product. 

I was wondering if it would be possible to have a similarly sized device that has GPS capability, and the ability to transmit the GPS location to a base station, at distances up to 500 m (Tiggy's estimated maximum range). There is a somewhat bulky GPS device available on the market already, that has a cellular transceiver. You need to purchase a monthly plan for it though, and the battery only lasts a few days I think before it needs to be recharged. I was wondering if it might be possible to use a LoRa transceiver instead for wireless communications, with a small GPS chip. If position updates were relatively infrequent, or occurred only at times of interest (e.g. when it is time to bring Tiggy in for the evening) it might be able to last a couple of months I think on a single coin cell. There would be some challenges in power delivery however, which would likely require a super-capacitor of some sort to be able to source enough current for times when the device is active. 

I purchased a couple of LoRa evaluation boards, that feature the very small 1SJ chip from Murata. On one of them, I attached a small, flexible antenna, although I needed to re-solder an incredibly small 0-ohm resistor on the board to do it, and I'm afraid this connection is a bit less than ideal, since the wireless power level sent from the device tends to increase by about 5 to 10 dB whenever I push down on the resistor with my thumb. Nevertheless, I was able to hook up one evaluation board on the railing of our deck, with a short stubby antenna, and positioned the other evaluation board with the flexible antenna at various corners of our property, to see what kind of wireless power could be received on the deck. Here are the results:
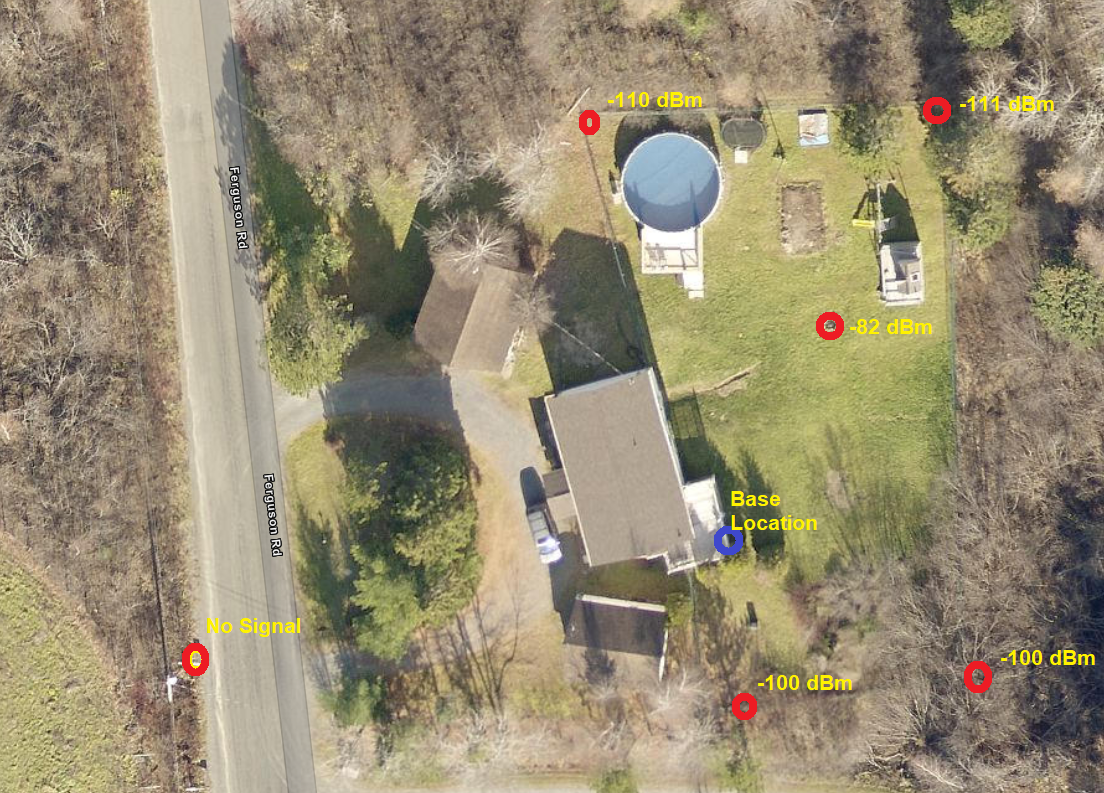

The amount of wireless power received was disappointingly low, but I think the aforementioned issue with soldering the miniscule 0-ohm resistor could be to blame. I think using a better antenna on the base station, and elevating the base station somehow (maybe on top of our roof) would work a lot better. Trees, buildings, and other obstructions really wreck havoc with the wireless signal, so I think in some cases, there won't be much that can be done. Theoretically, the LoRa transceivers should be able to work over a distance of ~ 10 km, but that assumes both transmitter and receiver are mounted high up, well away from the ground, without any obstructions between them. 

So for now, I'll keep at it, try to improve the wireless power throughput, and start looking at how to collect the GPS data. Tiggy is remaining mostly indoors now that it is December and usually too cold outside, so I'll have a few months at least to come up with something he can try out. 😀


Wednesday, May 31, 2023

Stream Logger

 Last month I thought it would be cool to position AMOS in the stream in our backyard, where it could take still pictures during daylight hours to make a time lapse video of snow melting, leaves budding, and stuff turning green. It would also be a good opportunity to test out the long term resilience of the boat to the elements. I put it in the stream with an anchor, on April 15, so there wasn't much snow left by then. In fact, it melted in just a day or two, so wasn't too impressive as a video. Also, the first few weeks were fairly uniform in terms of foliage coming out (i.e. there wasn't any, spring comes late to New Brunswick!).

Here is a still picture taken by AMOS on May 07:


You can just barely make out that there are tiny red buds on the leaves. At this point, the SD card on AMOS had filled up, taking a picture every 5 minutes for 12 hours per day. I removed the pictures from the card, and set AMOS to just take a picture every hour for the next 3 weeks. I also configured AMOS to go to sleep between pictures, which saved a lot of power and prevented the occasional loss of battery charge when the weather was cloudy for 3 or 4 days in a row. 

The following video was created from just those 3 weeks:


Around May 20, Kelly noticed a mother bear and two cubs playing around in the stream in the vicinity of AMOS. I didn't check on the boat until the 28th, but noticed that it had moved (or been moved?) from the middle of the stream to sitting atop a small dam structure constructed last year by a beaver:


 It's possible that a few days of rain after the 20th floated the boat up onto the dam, but I prefer to think that the bears relocated it. Muddy streaks on the top of the solar panel seem to support that theory. Unfortunately, the AMOS camera was only configured to take a picture at the top of every hour, and no bear pictures got saved. 

Desiccant was placed in both AMOS electronics boxes, but over time, humidity within the boxes did increase, and the front electronics box contained a small quantity of water at the bottom of it when I opened it up on the 28th. The following graphs show the measured humidity levels in both boxes over the entire time that AMOS was out there:


When AMOS was powered continuously during daylight hours for the first 2 weeks, it probably had a beneficial effect on keeping humidity levels in check. 

I have recently ordered some soft iron rods, magnet wire, and small permanent magnets, to try some experiments on a novel type of robot joint. If it works, it will have two degrees of bend freedom, but won't require conventional electronic motors to work, so should be smaller and lighter than most other robotic arm joints. An evening spent searching the idea on the Internet revealed a number of theoretical papers on the subject, but little hard evidence (i.e. YouTube videos of real robots working), so it sounds like a pretty good challenge. :-) 


Sunday, March 5, 2023

The Pi4 Update

I still have a couple of Raspberry Pi 3B+ boards left that have been used on demo AMOS boats, but I picked up a used Raspberry Pi 4B board recently from eBay to see what would be involved in updating the main AMOS CPU. Unfortunately it is not really possible for individuals or small businesses to purchase new boards at a reasonable price. The worldwide chip shortage has meant that most new units getting produced are being sold in large batches to large customers.

The Pi board I got from eBay came with this nifty little case though:


Although it won't be possible to use the case with the AMOSWirelessHAT board attached, I have been using it while setting up the various drivers, libraries, and other software that are required to help AMOS run. I chose the latest Buster operating system for the board, which has required various library updates, and a few code changes to support those newer libraries. In all software projects, this seems to occupy a significant, and somewhat annoying chunk of time. To me at least, it seems that the amount of work required to support more recent libraries and operating systems often outweighs any advantages the more recent stuff might have to offer. Or maybe I'm just becoming an old curmudgeon. 

To help speed these tasks, I started using ChatGPT for the first time. It's refreshing to get answers to questions that are in well-written English, although I'm not sure that the accuracy of the ChatGPT answers is much better than what you could do with a regular Google search. For one thing, the information / database that ChatGPT uses to generate its answers, at the time of this writing uses information up to September 2021, which meant that the answers it gave to some of my questions about recent Raspberry Pi libraries were a bit dated, and in some cases incorrect. 

A few days ago I tried out the latest revision of the AMOSWirelessHat board, but found that the position of the board's camera-cable slot was too close to the edge of the board, so that the camera-cable would have to be twisted and strained a bit too much. So a revised board was made and ordered, and should hopefully be here in about a week or so. 

The pepper plants that were described in the previous blog post are all doing well. There are even a few new peppers (filius blue) that were given to me to try out, from a co-worker at Measurand: 


All of the various types of peppers have sprouted; the big ones in the above picture are the jalapeños. I'm going to have to move them down to a lower level soon, before they get too close to the grow light (maybe add a second grow light!). I added a second relay to control the heating lamp independently from the grow light, so now the daytime temperature is always between 25 and 28 degrees C. With all of the plants and soil in there, I've noticed that there is a lot more humidity in the small greenhouse. At night, when the light gets turned off, I have been undoing the zippers in the plastic cover to avoid getting condensation all over everything. 


Saturday, January 28, 2023

Hot Pepper Grow-Op

 About a month before Christmas, I bought myself this hot pepper seed kit from Oh! Canada Seeds in Halifax, NS:


The kit contains seeds from 3 types of peppers: jalapeno, habanero, and ghost. I enjoy eating fresh peppers with various types of food, and had experimented previously with growing some tiny hot red peppers before, which were quite enjoyable in limited quantities, so this was a bit of an experiment to see if I could grow and eat some much hotter varieties. According to the kit, jalapeno peppers are between 2500 and 8000 on the Scoville scale of spiciness. For me this is a comfortable level. I enjoy eating maybe one or two small jalapenos with a few slices of pizza or a plate of nachos. 
Habanero peppers are in a different league though: 100000 to 350000 Scoville heat units. I'm pretty sure I've never eaten anything that hot. And ghost peppers nearly top the chart: 850000 to 1041427 Scoville units (that's a lot of precision!). According to the seed kit, the only thing hotter is the Carolina Reaper pepper (1400000 to 2200000 Scoville units). 

Naturally, the peppers would need to be started indoors, in my small greenhouse. The greenhouse is constructed from metal tubing, and has an opaque plastic cover around it. It is maybe about 2 ft x 2 ft square by about 5 ft high and is kept in the laundry room of our house. To make sure the plants get enough sunlight and heat, in the past I have hooked up a UV grow light and incandescent bulb (for heat) to a light-timer circuit. This has generally worked OK, but the timer circuit sometimes needs to be adjusted if the power goes out for a significant length of time, and it isn't as much fun as having a microcontroller-based setup with digital control and data. 😜

So the idea was to complete a small Arduino-based project over the Christmas break to provide simple on-off control of the heating / lighting and provide some data feedback on the temperature and humidity inside the greenhouse, which could be used for deciding when to provide more water to the growing plants, or possibly at some point in the future for adding an automated watering system. Of course, things were busy over the Christmas break with traveling, illnesses, and afterward, work commitments. So the small few-day project has turned into a month-long project, before it could reach an acceptable point where I could at least blog about it. 

One major goal in completing the project was to figure out some way of using the same HM-10 BLE (Bluetooth low-energy) device that is used on the AMOS Remote for communications with a host PC that could be used for data viewing and graphing. There is a wealth of online information about how to interface to the HM-10 and related BLE devices with a mobile Android or iOS device, and that was what I used for the mobile Boat Captain software that runs on Android phones and tablets. Surprisingly though, there seems to be very few examples of how to communicate over BLE using a PC. I was however, able to find this project: https://github.com/sensboston/BLEConsole which turned out to be a really well written C# console application for doing every possible thing you could ever want to do with BLE devices connected to a PC's Bluetooth radio. I was able to adapt sections of this code to work in a simple GreenhouseViewer app that I created for viewing data from the greenhouse:


Similar code changes could be made for the PC BoatCaptain software to allow the PC to connect wirelessly to the AMOS Remote, which in turn connects wirelessly to AMOS. Currently, the AMOS Remote needs to use the included USB cable when it is being used with a PC. If the AMOS Remote were situated atop a pole for better line-of-sight however, using the USB cable would likely not be practical. 

So far, the only plants that have sprouted are the jalapenos:


Possibly the hotter peppers require more time? Or maybe this is just the universe's way of protecting me from too much spiciness. 

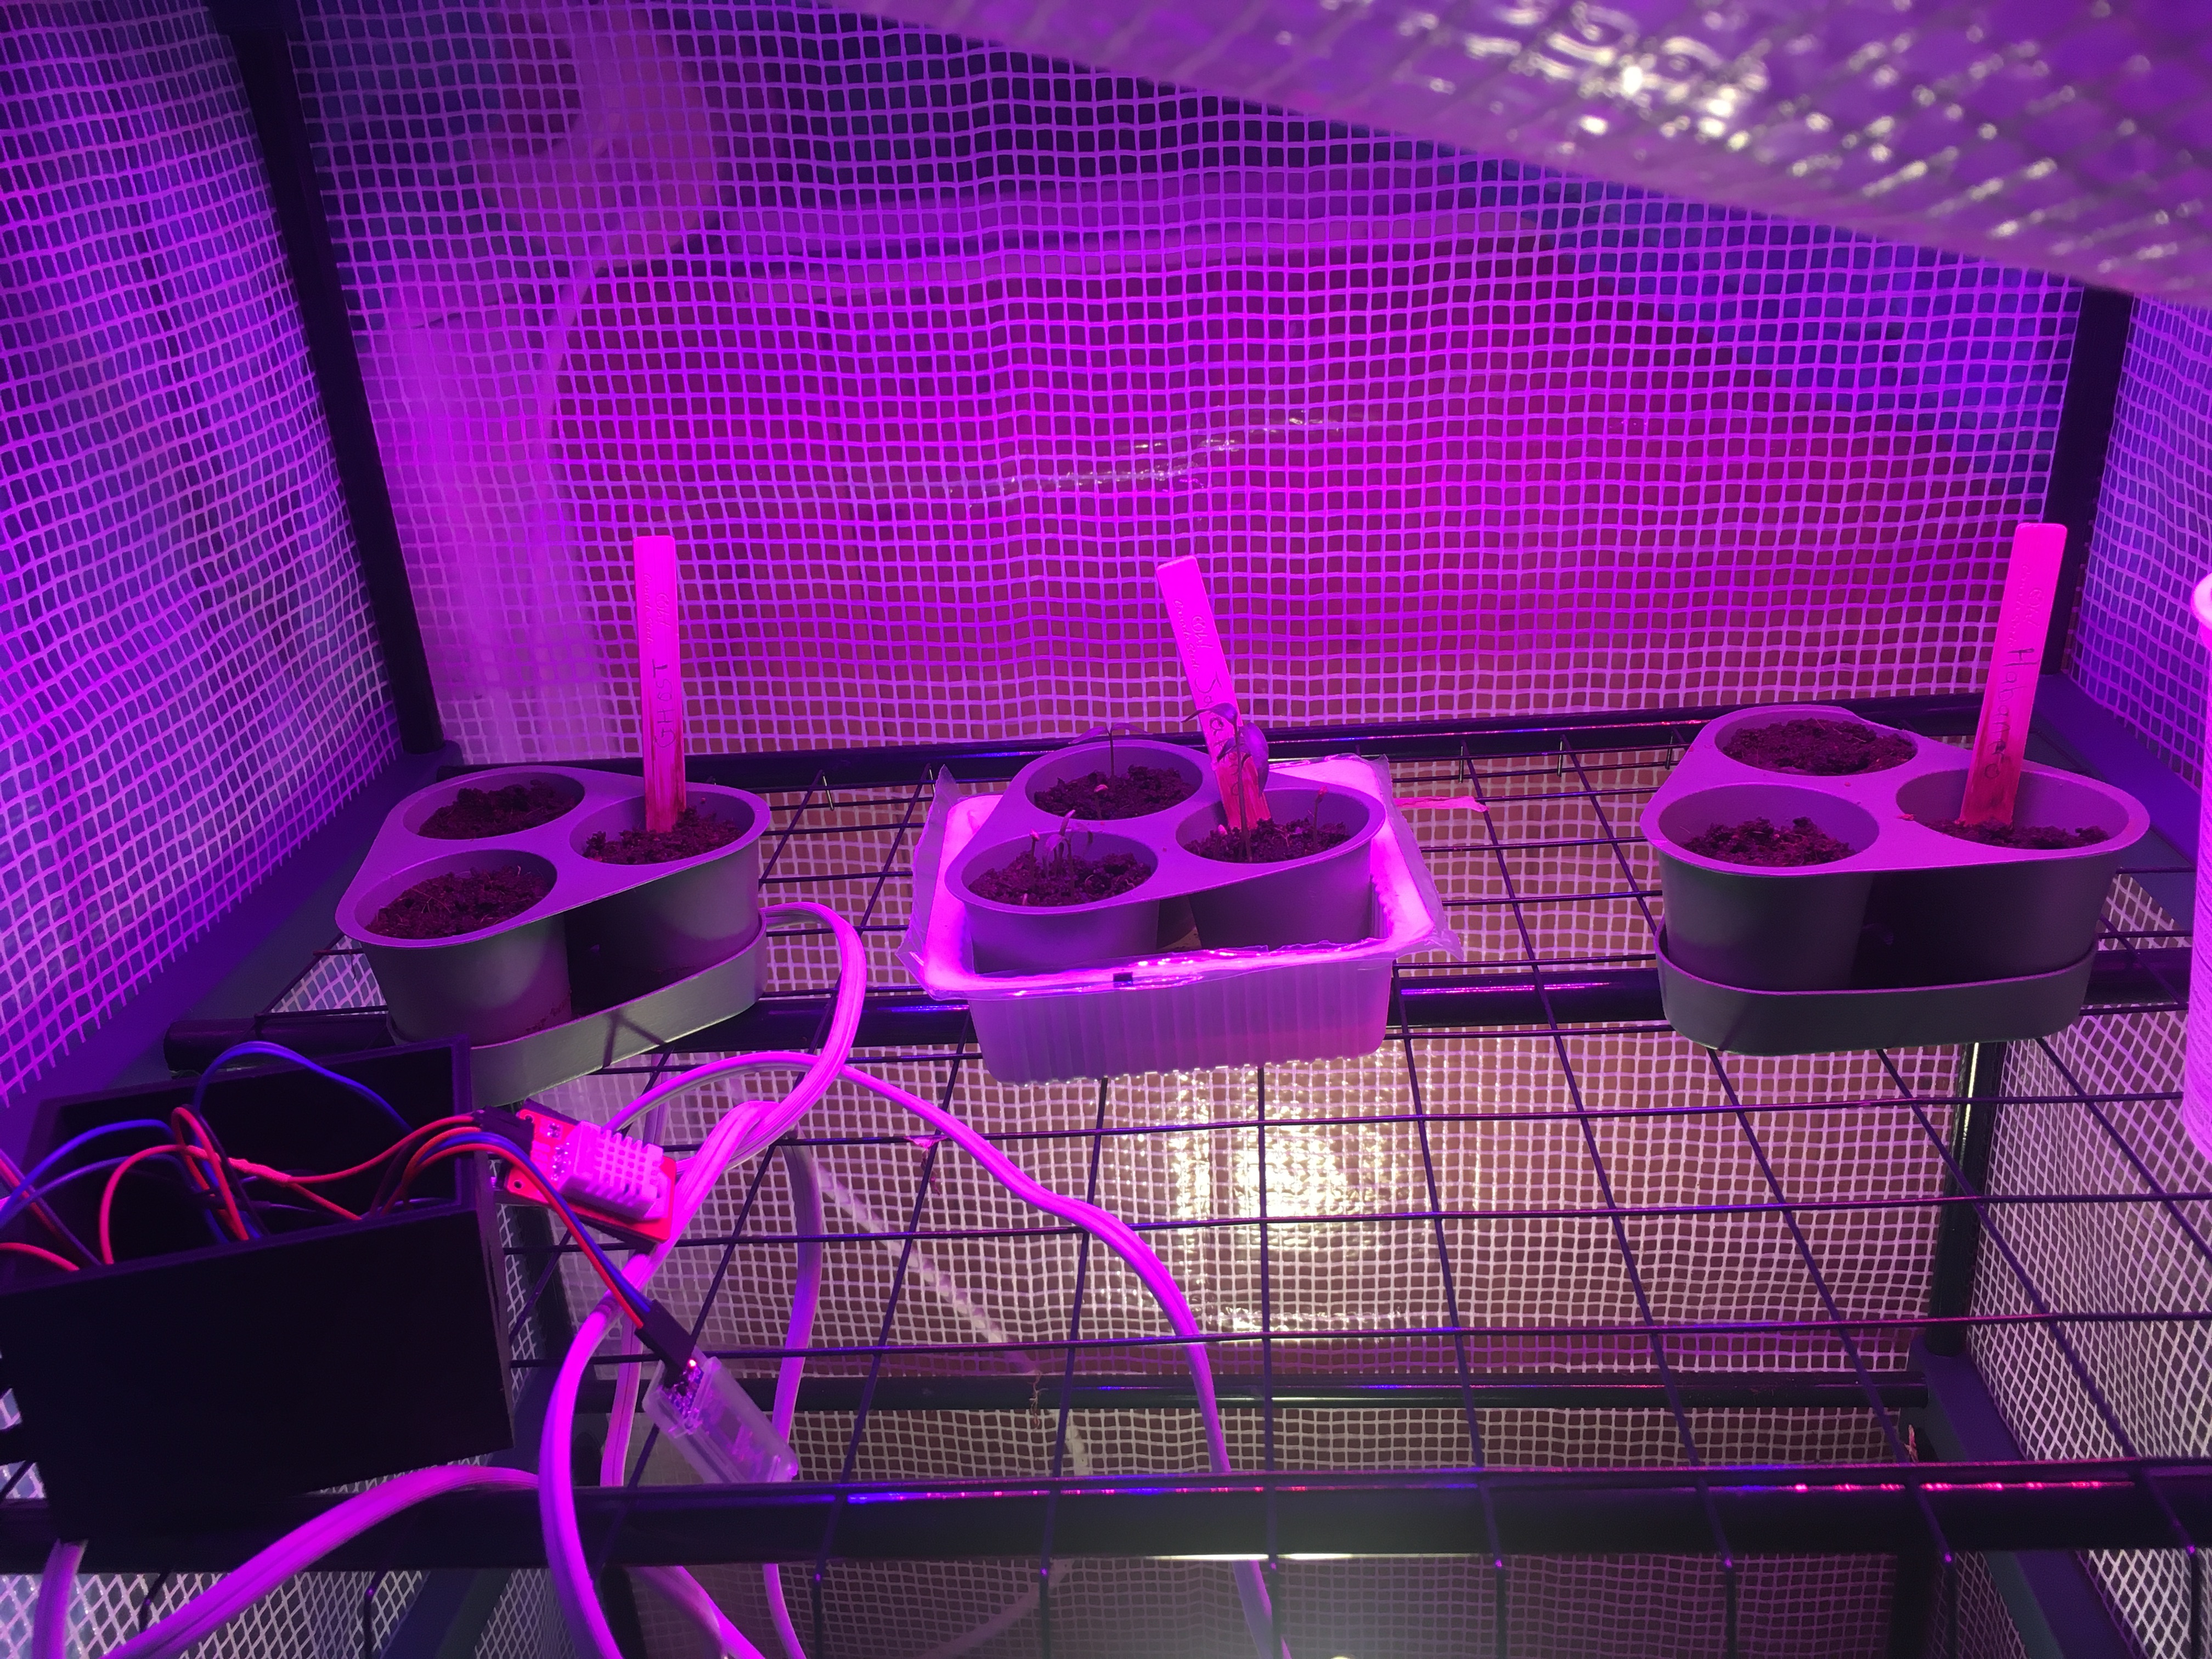
Here are some other pics of the setup: 


Not shown are some blankets that are draped over the outside of the greenhouse. The blankets serve as insulation for keeping in the heat and for preventing the harsh UV light from hurting anybody's eyes. I have noticed that the humidity shoots momentarily way up at night (> 80% and then gradually settles to ~ 70%) when the heat and light get switched off. This probably isn't great for the electronics, as they are openly exposed to the air. I've done similar stuff in the past though, and never experienced any problems, so hopefully it will be OK here too. 


Sunday, November 6, 2022

Pool Drain Test

As mentioned in the previous blog post, a test was planned to position an AMOS equipped with a conductivity sensor in the pond / stream in back of our house, in order to see if there was any noticeable change in conductivity in the water due to draining of the pool. The pool uses salt and a chlorinator during the summer months to keep it clean, but we need to drain it every fall before the water freezes, to make sure there isn't too much ice build-up in the winter. The water within the pool had a conductivity of  4.395 mS/cm. 

The location where AMOS was placed unfortunately had a fair amount of tree cover:

but thankfully not many leaves were left, and there was a nice bit of sun on the afternoon when the bloat was deployed and this picture was taken (October 23). The depth of the water in this area was almost up to the top of my rubber boots. 

Unfortunately, the good weather did not last, and the rest of the week saw near constant rain, with scarcely any sun at all. On the evening of the 24th, I placed a sump pump into the pool with a garden hose connected it to it, and started pumping out water to the corner of our fence nearest the pool.  The pumping went all night, and I shut it off at around 8 am the next morning. Close to 1 m was pumped out of the pool. The pool has a diameter of 8.2 m, so this would correspond to a volume of:

Volume = pi * (8.2/2)^2 * 1 = 53 cubic meters, or 53000 L. 

Here is a picture showing the location of AMOS relative to the pool:

The distance from the pool to AMOS was approximately 45 m. 

AMOS was configured to collect data every hour, and go into low power mode between samples. The plan was to leave it in place for about a week or so, to evaluate the long-term effect of the pool draining. But low power mode wasn't nearly as low power mode as I had hoped, because I had forgotten that the temperature / conductivity sensor and the GPS board were powered continuously. Had a switching circuit been employed to turn these off when they weren't required, a fair amount of power could have been conserved. As it was, when AMOS was sampling it was consuming about 8 W, but when it wasn't sampling it was still consuming about 3.5 W, which over time, given the lousy weather, proved to be too much, and at 4:00 am on October 26, the main battery detected an under-voltage condition and flipped itself off. 

The data was downloaded from AMOS, and graphed:


The short-term resolution of the conductivity sensor is specified as 0.001 mS / cm. Based on the above graph, the long-term variation (hour-to-hour) appears to be a bit greater, something like  +/- 0.004 mS/cm. There does appear to be a weak upward trend in the above data after the pump was started, but the increase is only about 0.002 mS/cm. The specified stability of the sensor is 0.003 mS/cm/month, so I'm not sure the above data represent conclusive evidence that the draining of the pool affected the conductivity of the stream. The large amount of rain which started on October 24 and continued throughout the week greatly increased the flow through the stream, which might have reduced the amount of pool water that collected around AMOS. The soil in our backyard is fairly loose and sandy also, with good drainage, so perhaps very little pool water would have been transported to the stream, even without the rain. 

So to summarize, it looks like a re-do is in order for Fall 2023. 😊


Thursday, October 20, 2022

Zippy Mini-AMOS

 Shortly after fixing the software issues for control of the upside-down servo motor on Mini-AMOS, an improved mechanical attachment was created for the servo, and the boat was brought back to Kelly's Creek for a new test. Only about an hour was available for the test, but the boat was able to travel down the river past a small island about 2 km away and back in less than an hour. The top speed was probably ~ 7 km/h, but with stops at checkpoints and pauses to periodically check the boat's heading, the average speed worked out to ~ 4 km/h. Probably some room for trade-offs there, i.e. sacrificing some positional accuracy for speed. Here's a short video of Mini-AMOS as it sped back past the island:


Various software improvements have also been made for both Mini-AMOS and the regular surfboard AMOS. The water propeller on Mini-AMOS can now also be driven backwards, which gives it some extra maneuverability when being manually driven with either the PC or mobile app. Some bugs / stability issues were fixed in the AMOS robot and PC software, and all of the software has been brought into Jira (an online issue & project tracking software: https://www.atlassian.com/software/jira) and bitbucket (https://bitbucket.org/) for easier issue tracking and organization of all of the various AMOS software pieces. 

Next up will be an interesting citizen science sort of test of AMOS right here in our backyard. Every year about this time, we empty most of the water in the pool before it freezes. Since we use a salt-water chlorinator for the pool, the water being drained is a bit salty, and I have often wondered what kind of an environmental impact there might be on the small stream / pond in our backyard, about 80 m slightly downhill from the pool. The demo surfboard AMOS will be placed in the stream / pond with an anchor and a conductivity / temperature sensor, and allowed to float there for a day or two before the pool is drained, and then while the pool is drained (probably about another day). If a significant amount of salt reaches the stream / pond, the conductivity sensor should register a change. AMOS will be configured to be in sleep mode most of the time to conserve power, as there isn't much sunlight in that part of the backyard, especially at this time of year, but it will wake up to take readings every hour. 


Monday, September 12, 2022

Mini AMOS / Wireless HAT Field Trial

 It turned out that the output signal I was using to drive the relay switch on the Wireless HAT board was too weak: instead of activating the coil at 3.3 V, it got pulled all the way down to ~ 0.3 V. Fortunately the output wasn't damaged, and just needed a little boost. I knew I had purchased a bag of NPN power transistors about 4 years ago that never got used, but I searched all over the house, garage, and playhouse, to no avail. Probably they will turn up somewhere. Instead though, I discovered this old board:


from a 2004 Circuit Cellar electronics design contest that I had entered. It was intended to be a combined optical / acoustic motion capture device, but it was pretty glitchy and I never got a chance to  finish it. Instead, my 3 daughters were born (10 weeks ahead of schedule) and the project was permanently shelved (but not thrown away 😉). Anyway, the board had four 2N3904 signal transistors on it, so I de-soldered one, soldered it up to the relay coil, digital output and a 1K resistor, and then the relay worked great - AMOS was able to switch on and off into its low power state. 

The problem with the real-time clock (RTC) was much easier to fix. I had simply forgotten a command-line call to set it up properly. 

The remaining hardware was hooked up for the Mini-AMOS build, and the boat was tested out in the pool under manual control. It seemed to work pretty well, and had plenty of power with the water prop. Yesterday, I brought the boat to Kelly's Creek to give it a spin on a planned route. I had to tow the boat out past the weeds in order to avoid fouling the propeller.


But when the boat was allowed to start on its course, it behaved very erratically, sometimes looping in wide circles, and other times weaving back and forth, following a seemingly random path:


Going over the code later, it was easy to see that the reason for the erratic motion was because the instructions for setting the rudder angle did not take into consideration the fact that the servo motor on AMOS Mini is mounted upside-down. There was also some code that was incorrectly setting the rudder angle back to zero at various times. These code issues have been fixed, but I will need to also find a better way of securing the servo motor at the back end of the body board. It was basically just epoxied into a slot at the back, and towards the end of the test I could see that it was starting to work its way loose a bit.


Sunday, August 21, 2022

AMOS Wireless HAT version 2.0

The modified AMOS Wireless HAT boards arrived a couple of weeks ago, along with a larger A to D board for easier soldering, and a different 40-pin header that fits much more comfortably onto the Raspberry Pi board pins. I went ahead and populated all of the components, but did notice a few problems during assembly:

1) The relay switch is too big to fit on the top side of the board where it was supposed to go, and the package size for the switch is smaller than I expected, so it was necessary to solder some jumper wires onto the bottom side of the board to connect it. 

2) The A to D board extends a bit too far over a terminal block that was intended for the A to D inputs. The input wires can just be soldered to the board directly though, so not a big problem. 

3) The USB-serial converter board is dangerously close to the metal shell of the HDMI connector on the Pi board. For testing purposes, a piece of duct tape was stuck over the USB-serial converter board to avoid shorting. The USB-serial converter board is also directly over the camera connector on the Pi board, so there is no room to insert a camera cable. The HAT board needs to include a hole large enough to accommodate a camera cable. 

4) A lot of the text that I had added to the second version of the board (company name, website, etc.) is missing from the board. I'm not sure why, but I'll try to figure it out before the next version. 

Issues 2 and 3 could have been avoided with better 3D modeling I guess, but 1 and 4 require a board re-design anyway, so little would have been gained by fancy 3D analysis. 

Here's what the top of the combined boards looks like when placed inside an electronics enclosure for testing:


You can't really see the wireless sub-module and and USB-serial converter because they are on the bottom side of the HAT board. Even though the compass module and GPS are not installed yet, and the wires from the battery box are not yet connected, it is clear that this should really reduce the amount of wiring, to clean up the enclosure. 

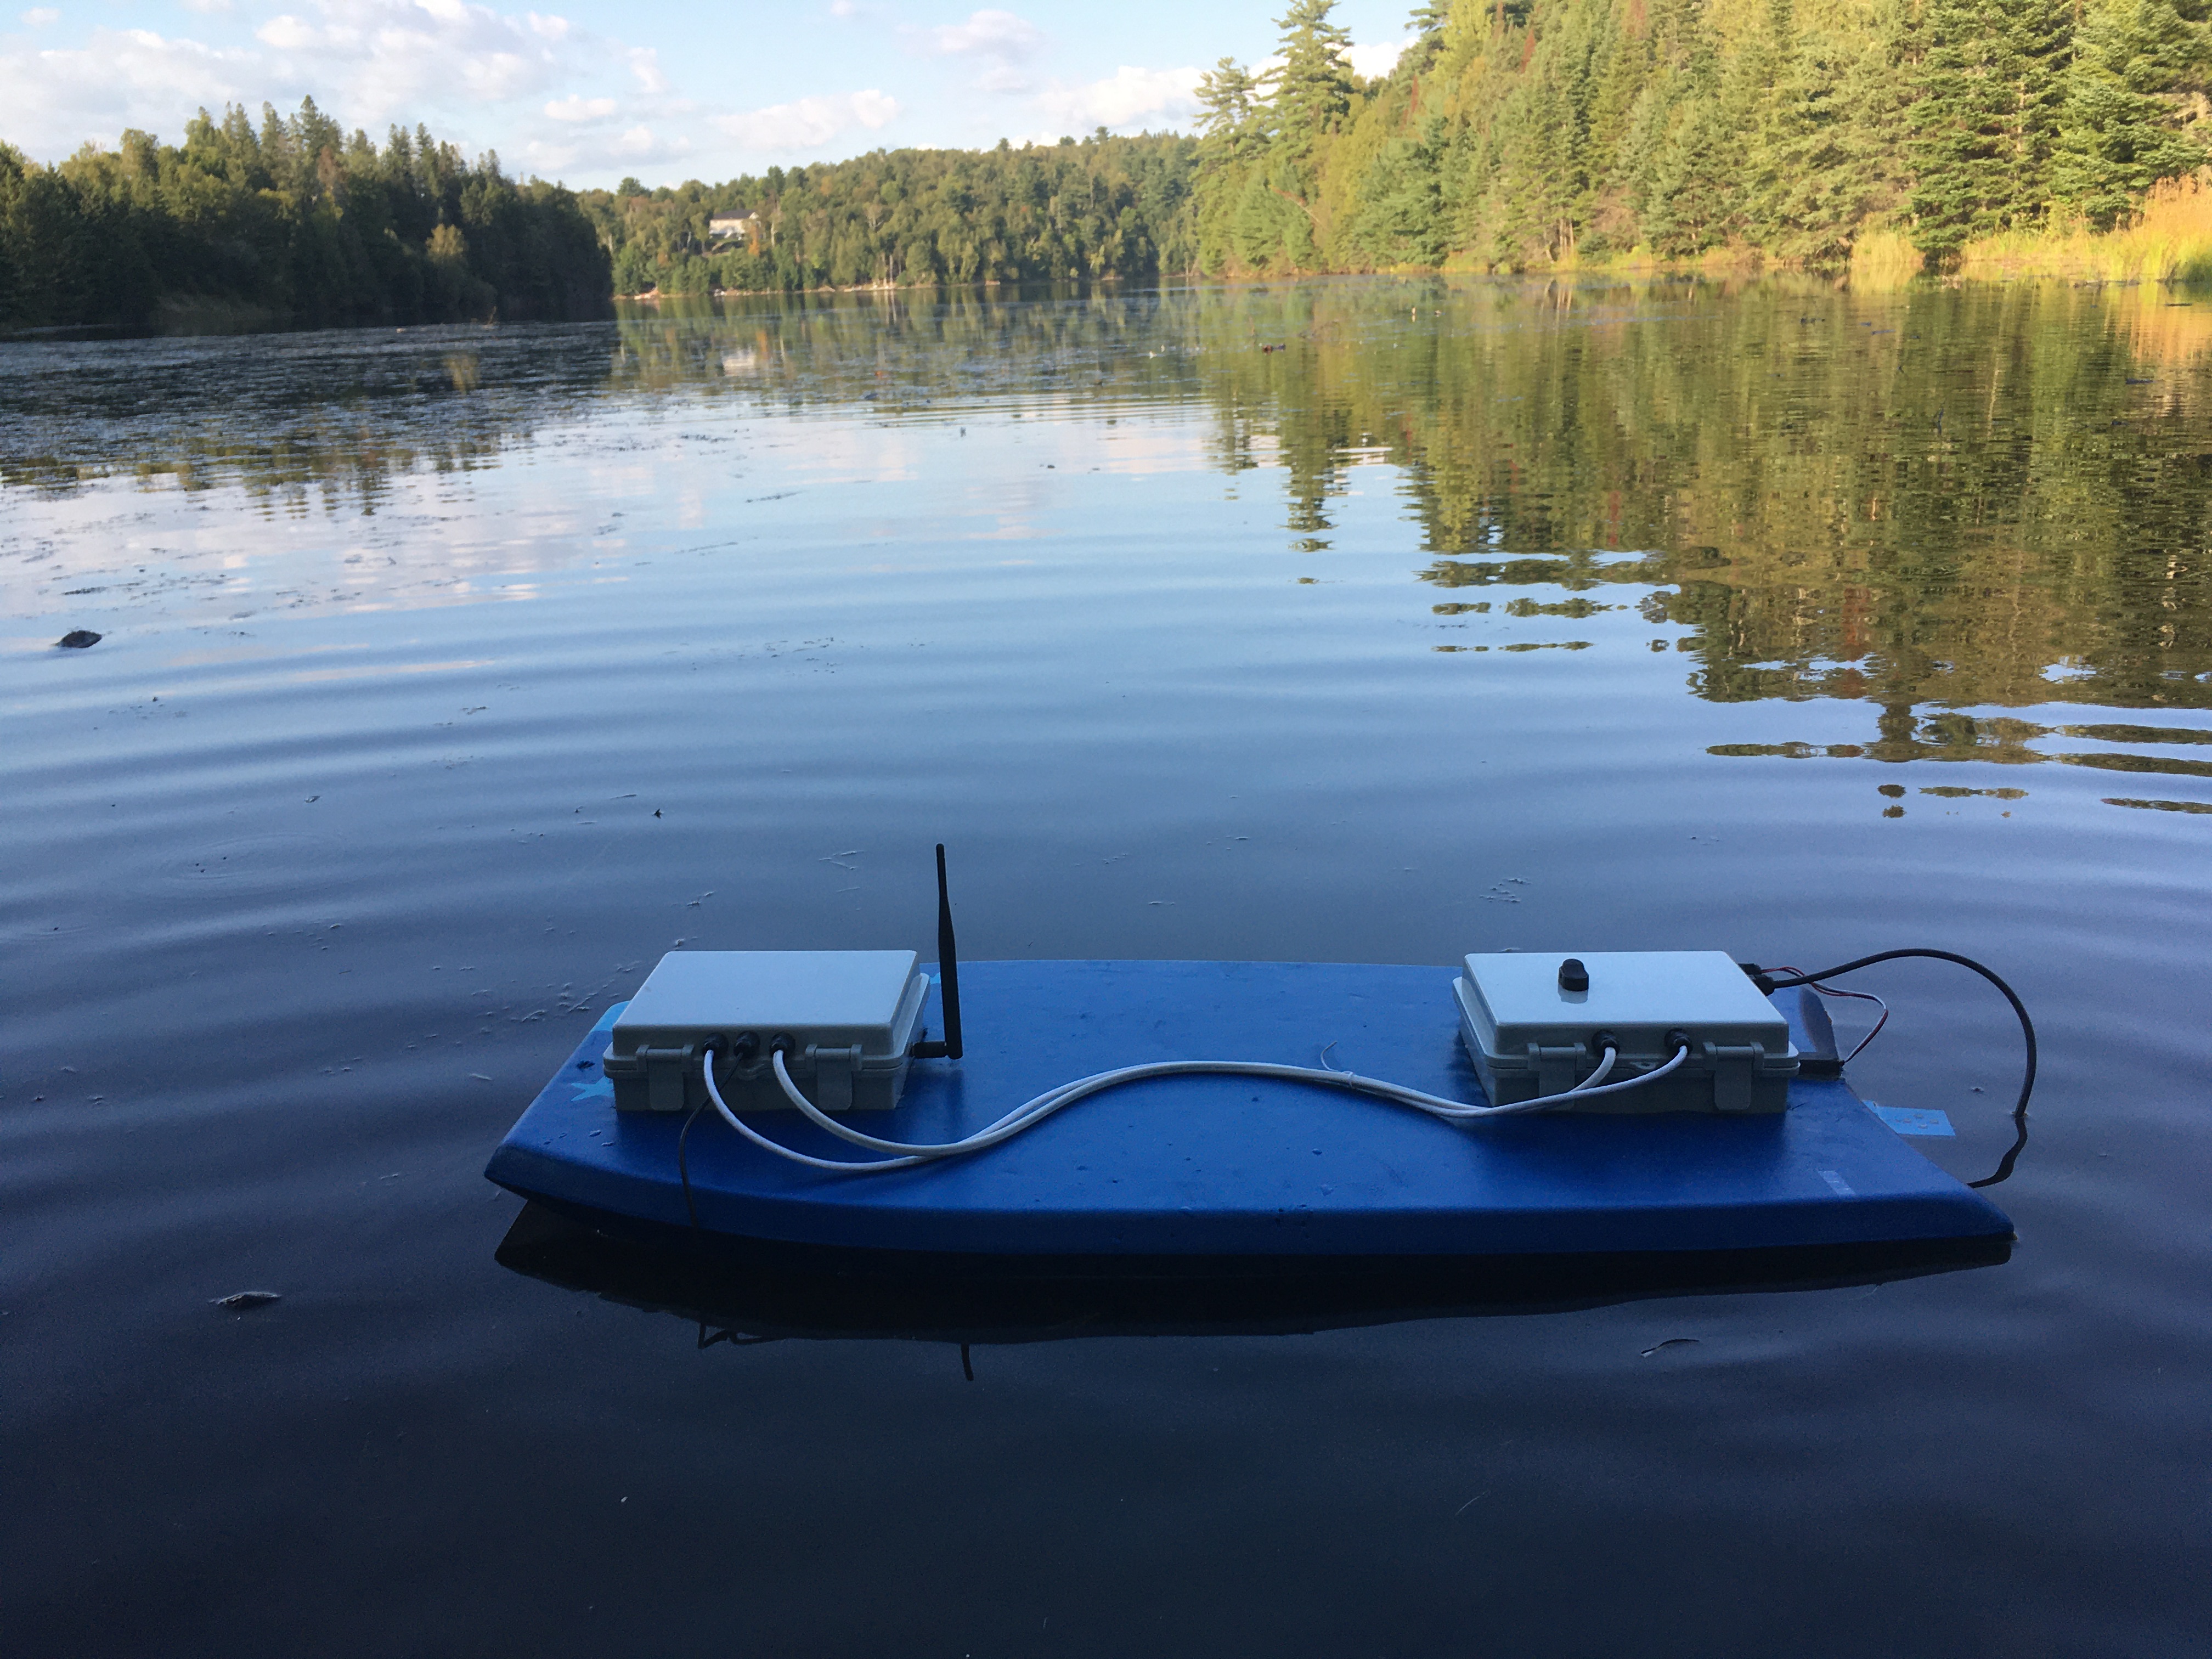
This build will be a new shorter prototype AMOS with a single water prop. It won't be solar-powered, but I'm hopeful that it should be quick and speedy for relatively short (< 3 hours) missions. Here are a couple of pics:


Before flicking on the power switch to test it out, I checked for shorts on the 3.3 V and 5 V power lines. There were none, but I was still a bit doubtful that it would work, so I was pleasantly surprised to see the red power LED on the Pi board come on properly when I flipped the switch, and saw some reassuring flickers of the green activity LED also, indicating that the Pi board was busy with the task of booting up.

Initial tests of the A to D function, humidity / temperature sensor, and discovery / setup of the wireless module worked well, however the relay switch for going into sleep mode and the RTC module did not work. I'll need to debug these to figure out what the issues are. I'll also need to hook up the remaining components to test / debug them as well. Once it's ready it will be exciting to take it for a spin! 😊 


Tuesday, July 26, 2022

Loose Fit, Tight Fit, and Misfit

This past month I was able to get AMOS out to the water a couple of times for some testing. The first time, I noticed that the boat always seemed to want to head off into the opposite direction. Initially I thought that the problem might have been an invalid initial GPS position, but even after physically moving the boat to other waypoints further along the planned track, it persisted in moving in a direction exactly opposite to the planned direction. Testing a couple of days later at home showed that the compass error was consistently about 180 degrees. I tried using an old compass calibration for the same device, but it too gave similar errors. I also double-checked the IMU board orientation within its enclosure, but it was correct. The only thing I can think of is that the polarity of the magnetometers must have been reversed somehow. Nothing in the part's datasheet says whether this is possible or not, and I'm not sure what sort of event (large magnetic field nearby?) might have caused the reversal to occur. During the last calibration, the heat got accidentally left on during the final temperature calibration, which caused some of the calibration apparatus to melt, and undoubtedly exposed the chip to some higher than normal temperatures. Perhaps higher than its specified limit of 85 degrees C. Not sure if that could have caused the polarity of the sensors to reverse though. 

For AMOS's second trip to the water, the IMU board was simply reversed, so that it could properly be used for navigation. The fish finder was running, measuring depth, and an underwater Weatherbox was used to record some underwater videos at various points along the course. Here's a short video of AMOS setting out on the course:


and the resulting interpolated depth map that was produced:


However, the Weatherbox had a bit of a leak, and must have quickly filled up with water, because none of the videos recorded were recognizable (mostly weird brown color flashes and bits of electronic noise). Unfortunately, the Raspberry Pi camera died after about 2 hours (the last recorded video was cut short) and couldn't be revived, even after a thorough drying later at home. Initially I thought that the leak might have been caused by the parts coming loose due to the temperature difference of the water (colder) vs. the air (warmer) where the parts were screwed together. But a later test at home in a bucket of room temperature water showed that the screwed together parts leaked fairly rapidly, and a closer inspection showed that there were some imperfections in the glued surface under the o-ring. Repeating the test with a different WeatherBox showed no leaking at all after 24 hours. Re-gluing the original WeatherBox, using a 10 lb weight to hold down the o-ring helped reduce the amount of leaking, but did not get rid of it entirely. It's possible there could be some other crack or imperfection in this WeatherBox that is causing leaking to occur. I think I will need to fit the WeatherBox with a leak sensor or two to help save money on Raspberry Pi cameras. 😏

I started working on populating the AMOS Wireless HAT board last week. I started with the 40-pin female socket for plugging into the 40-pin male connector on the Raspberry Pi, since I had some uncertainty about the board design and how it would fit atop the Raspberry Pi board. I soldered the 40-pin female socket to the Wireless HAT board, and then went to try plugging it into the Raspberry Pi board, but realized that the socket was soldered to the wrong side of the HAT board. Oops. So I took out another board, and soldered a new connector to the proper side of it this time. But when I tried to plug it into the Raspberry Pi board, it didn't really want to fit. I could make it fit by using a very large pipe wrench, but large pipe wrenches and circuit boards don't mix well. And commercial HAT boards plug into the Raspberry Pi board quite nicely, without any use of excess force. So I ordered some (hopefully) better 40-pin connectors on Amazon, which claim to be designed for use with the Raspberry Pi. I then tried my hand at soldering the tiny AtoD chip to the board, to see whether that was possible. It was not. The heat / size of my soldering gun, and my general lack of soldering skill was too much for the tiny pads, and they were easily mutilated and destroyed. So I also ordered a few evaluation-type AtoD boards from Amazon which are much larger and easier to solder, and adjusted the PCB design accordingly. Hopefully all of the parts and modified boards will be here in a couple of weeks, so I can try again.


Monday, April 18, 2022

AMOS Wireless HAT Module

 A lot has happened in the last few months, both in the greater world and in my own life. The war in Ukraine has unfortunately occupied much of my attention. I'm hopeful that the Russian invaders will be repelled from that country, but the present situation there is terrible, and I fear for the worst, both for Ukraine and the world as a whole. In my own life, I started officially working full-time at Measurand in March, although I had been unofficially working there full-time since November of last year. This means a bit less time for AMOS and In Nature Robotics, but the job itself is interesting, involving embedded product development and firmware. Plus having a full-time salary is helpful, given the way costs seem to be going higher and higher lately. 

In my own experience using AMOS, and in some of the feedback I've gotten from customers, one recurring issue has been the tangle of wires within the AMOS CPU box that connect the Raspberry Pi to the rest of the equipment (wireless module, AtoD, sensors, etc.). Sometimes one or more of these wires become disconnected, and it can be a challenge to find the disconnected wire and attach it to the correct location. 

Enter the new AMOS Wireless HAT (HAT stands for Hardware Attached on Top). 


It has a 40-pin header that plugs directly into the Raspberry Pi board, and uses printed circuit board traces rather than wires to connect the AMOS wireless equipment, AtoD board, and temperature and humidity sensors. It also allows direct soldering in of wires from the battery box module (for the propeller and rudder control). 

I have already noticed a few things that should be changed on the board, but the order for the first 5 prototypes is already in production, so I'll populate one to see how it goes, and then make some changes after that. 

The weather here is warming up; I'll need to get the demo AMOS up and running again to do some weekend testing again soon!


Sunday, January 23, 2022

Winter QA Testing

 Generally it's not a great idea to do AMOS testing in the winter-time. The local rivers and lakes are frozen, so an hour's drive is required to find the nearest available liquid water in the Bay of Fundy. And careful planning is required to ensure that tides, wind, waves, and the cold are all manageable. 

Two recent AMOS robot sales however required that the testing be done, so the van was loaded up in early January for a test down to McLaren Beach, just outside of St. John.


Both AMOS robots were equipped with underwater camera modules. Unfortunately, these proved to be problematic for the air temperatures of -7 deg C and water temperatures of 5 deg C. The plastic tubing, normally quite flexible at room temperature, became as stiff as steel in the cold. In shallow water, this meant that AMOS would get stuck (if it was moving slowly) or might snap off the top connector of the tubing if it struck the bottom at a high speed. So I packed everything up and headed back to make a couple of plugs for the camera holes; the underwater testing component would have to happen indoors. Fortunately the final destinations for these robots are considerably warmer than Canada in the wintertime, so freezing camera tubing won't be an issue. 

A return trip was then made to the Irving Nature Park a few days later, as McLaren Beach was inaccessible due to a recent snowstorm. The waves were stronger here, as it was less sheltered, but the first AMOS went through its sampling course flawlessly. The second one had trouble even starting however. It started up fine prior to leaving, and started up fine inside the van, but within a few minutes of having it outside on the beach (again about -7 deg C) it abruptly lost power and the LED light on the  power switch went out. My guess at this point was that the switch was faulty and didn't perform well in the cold, so after driving back I replaced it. 

A third trip was then made a few days later to Lorneville, as there was a strong wind out of the south that day, and the selected spot offered a bit of shelter from the strong open-water waves. Once again however, the AMOS robot lost power in the cold, usually shortly after the propeller was driven at high speed. This time I thought to carefully check the solar charge controller, and realized that its short-circuit protection circuit was engaging. This was a newer version of a controller which I've been using for the last 3 years; previous versions allowed you to disable the short-circuit protection feature, but this version did not. So back to Fredericton, to replace the solar charge controller with an older model. 

On the fourth trip back (to McLaren Beach), the 2nd AMOS robot also worked flawlessly:


So now both units have been shipped out and are due to arrive early this week. I'm looking forward to seeing how they will be used over the next few months. Hopefully around the middle of this year I will be able to provide an update blog with some details!

In support of these systems, the support page has been updated, and a number of YouTube instructional videos for assembly and testing have been created. These are a bit rough at present, but they should be effective I think. 


Saturday, November 13, 2021

Mini AMOS


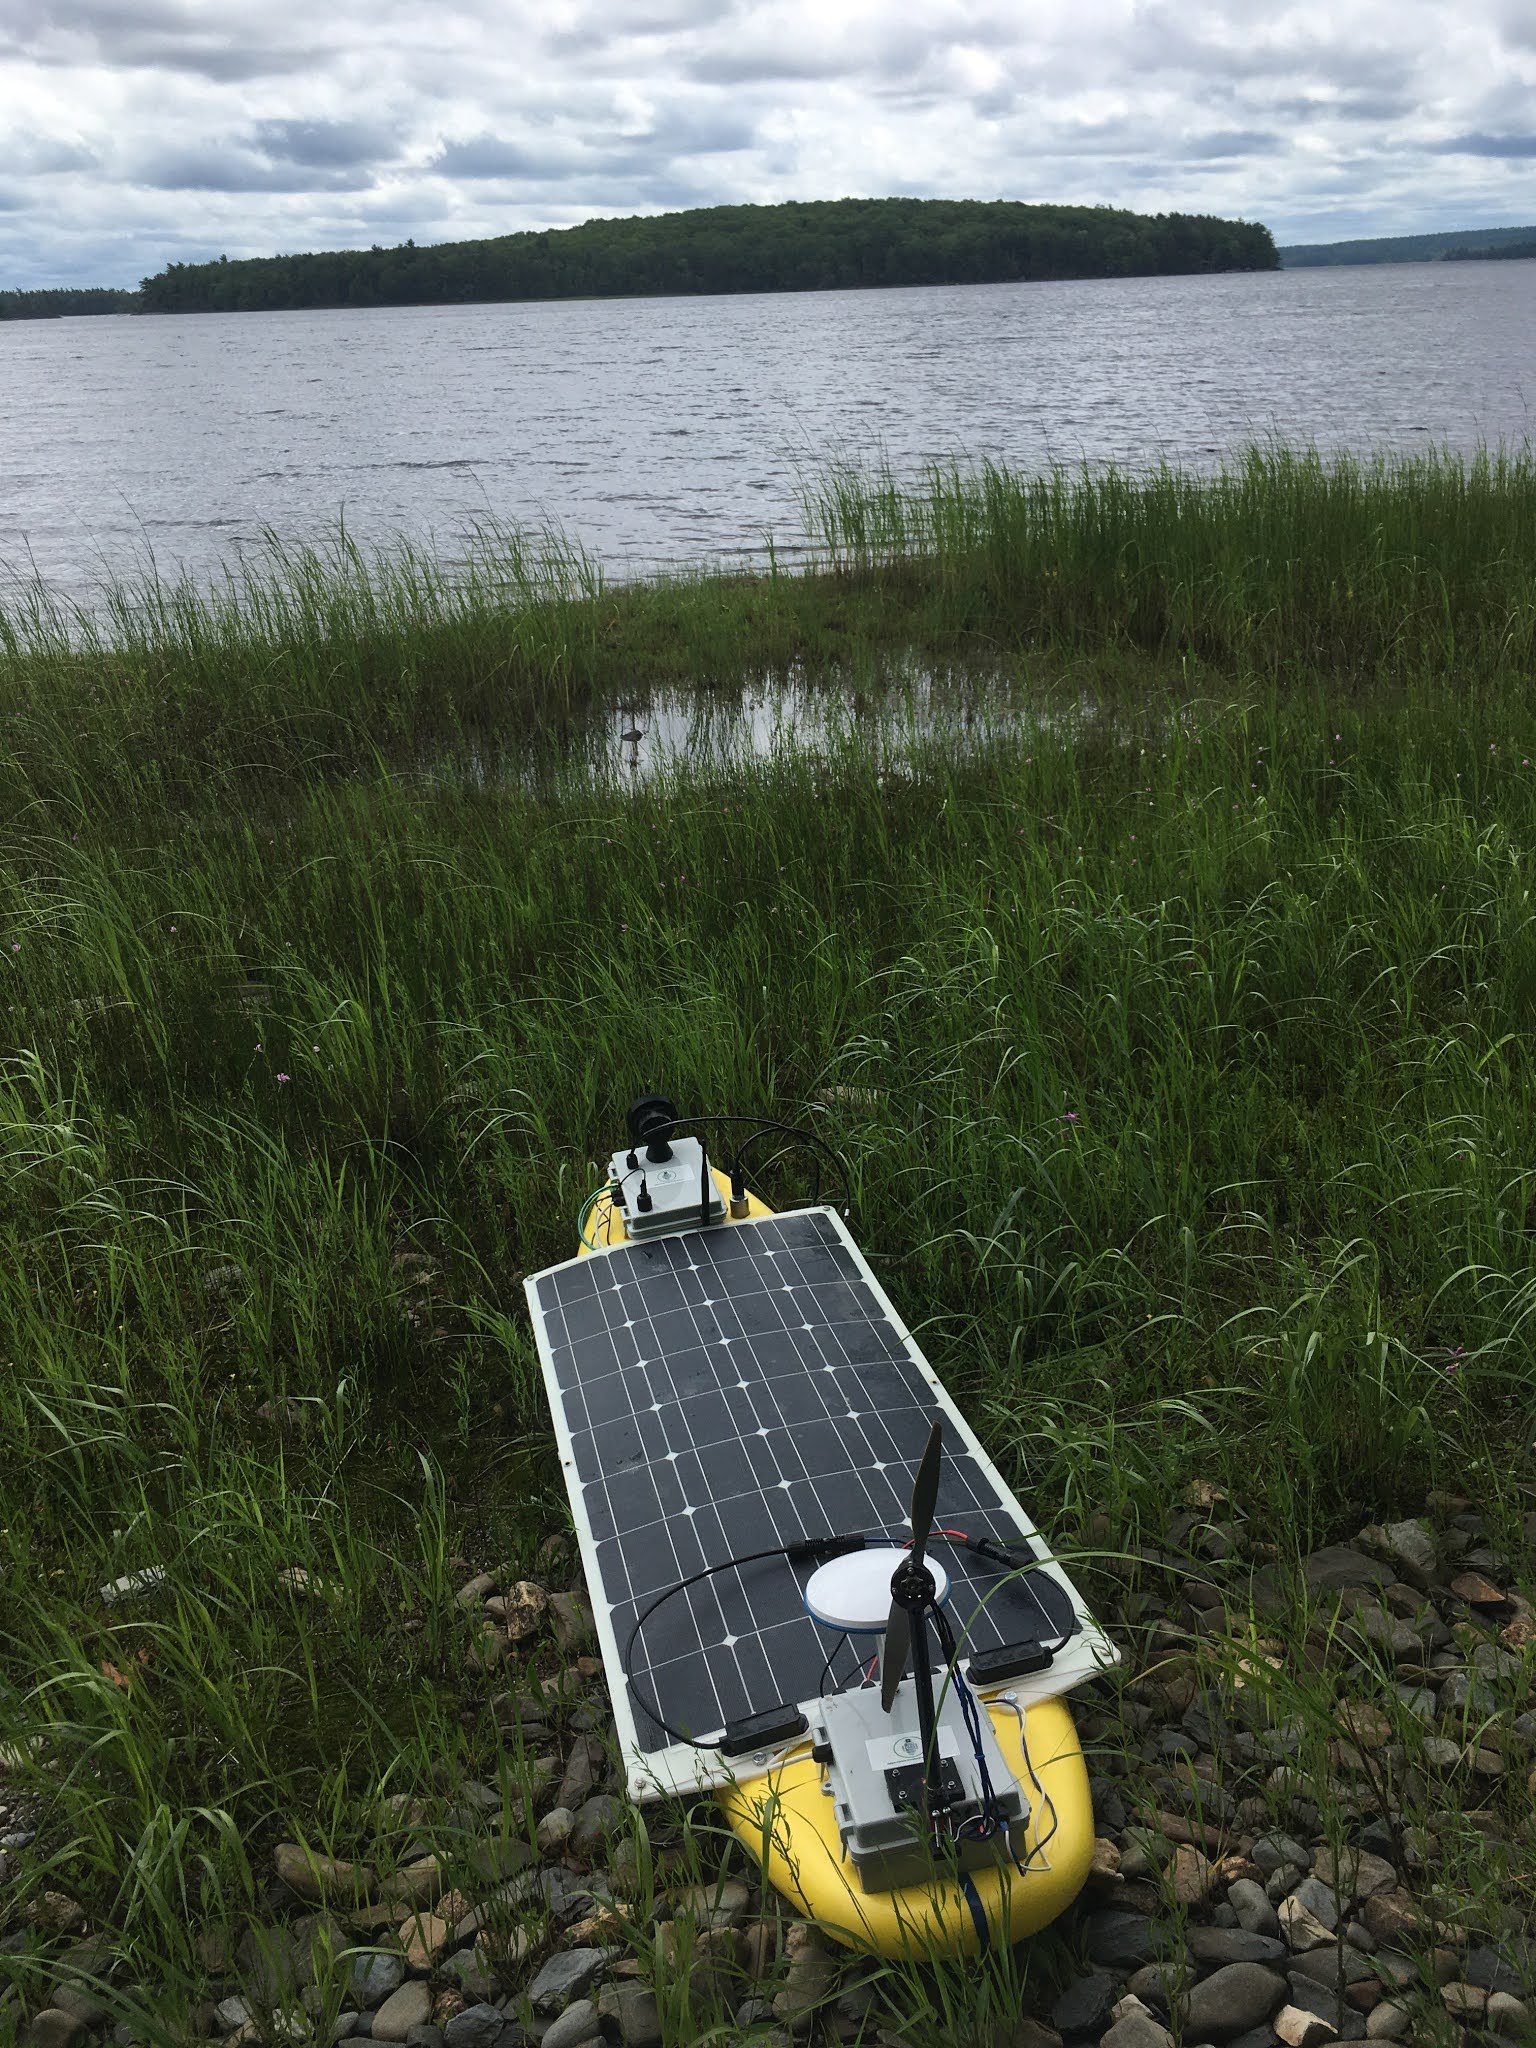
Here are some pictures of the latest AMOS version (perhaps to be called "Mini AMOS"). It uses the same electronics boxes as the regular AMOS, except it only uses a 4 foot long bodyboard, doesn't have a solar panel, and uses a water propeller instead of the air propeller on the standard robot. The board shown below doesn't have a survey-grade GPS antenna (just uses a GPS / USB stick), but that could be added later if desired. As it stands right now, its weight is only 4.5 kg. 

There will need to be some minor software modifications to drive and control the water propeller, but these should be relatively minor. It will be interesting to see how fast it can go, and / or what kind of performance it has in wind, waves, currents, etc. 


Thursday, October 7, 2021

Flexible Underwater Ribbon Cable Guide

 The previous rigid 3-D printed shell that was used to join the underwater WeatherBox to the main electronics box on the AMOS surfboard needed to be replaced with something flexible that could flex and swing out of the way whenever underwater obstacles were encountered. 

Some inexpensive plastic tubing was purchased at Home Depot, and 3-D printed adapter parts were constructed for either end of the tubing, to join it to the WeatherBox at the bottom end and the main electronics enclosure at the top end. 


This made a nice, water-tight conduit for the camera cable to follow, but it proved to be difficult to design the top piece to be strong enough to withstand large bending moments that were produced whenever AMOS passed over a shallow, rocky area. Three different top-piece designs were fractured in separate field tests before switching to a slightly different design using a large cable gland at the top. Instead of fitting the top end of the tube over a 3-D printed male plastic piece, the top end of the tube was fitted inside the cable gland. A small amount of heat treatment with a heat gun was applied at the top end of the tube to allow it to compress slightly and ensure a snug fit. 


This design worked perfectly: it had enough "flex" to be able to swing up out of the way of obstacles, without putting too much stress at the top cable gland connection. Here is a video of AMOS crashing into an underwater rock. The WeatherBox and its cable guide swung out of the way and were undamaged:


I enjoy combing through the videos from these tests, looking for fish. Here were a couple that were briefly captured in the most recent test yesterday (October 6):


My favorite clip came at the end of the test when AMOS was just floating near a partially submerged tree. I really like how the light from the sun is shining on the tree in this video, it looks kind of magical:


Friday, September 24, 2021

AMOS Captures Some Fish

 Things have been busy lately, and there hasn't really been much occasion for taking AMOS out in the field. Over the last week though, I was able to develop some software for saving 30 fps 1920 x 1080 video files on AMOS, while still continuing to do all of its regular navigation and data saving stuff. Testing and debugging was done in the pool, and everything seemed to be working well. 

This morning I took AMOS out to Kelly's Creek to test how the navigation, sensor data saving, and video recording all worked together. I was worried that the addition of the video recording in a real environment would slow down the other functions, possibly resulting in sluggish handling or missed data samples. Everything seemed to work pretty well though, although when I had plotted the course the night before, I had not realized how low the water level actually was. The waterline was about 10 m in from where it appeared to be on the ArcGIS map that was used to setup the course. Unfortunately, the WeatherBox  that housed the camera underneath AMOS struck a rock at full speed, and the 3-D printed extension piece that connected it to the main electronics enclosure snapped under the strain. The WeatherBox was quickly flooded, but I was following close behind in the kayak and was able to turn off AMOS's power switch a few seconds later. Clearly a more flexible extension piece will be required here. Perhaps something like a short rubber hose could work?

Despite this accident, the rest of the test was a success. Depth, temperature, and conductivity data were all recorded normally, AMOS navigated itself normally, and 9 video files were recorded, mostly of air bubbles and river vegetation, but at 1:10 of the video below, you can see 3 small fish swimming by for a few seconds:


The end of the above video is where the WeatherBox struck the rock and the camera module was flooded. Unlike the last camera flooding which occurred in salt water, this one was in fresh water, and after storing the camera module in a bag of desiccant for 12 hours, it was confirmed to be unharmed. 


Wednesday, September 1, 2021

AMOS Looks Underwater

 Last month's assumption that the o-ring seal on the WeatherBox required improvement proved to be correct. The printed part had tiny imperfections underneath the o-ring that allowed water to slowly leak through. A WeatherBox customer who was using it to observe a muskrat underwater came up with a brilliant solution: he found that using some marine goop (ex. https://www.homedepot.ca/product/amazing-goop-marine-109-4-ml-3-7-oz-/1000183125) in the channel holding the o-ring worked to fill in the small imperfections in the plastic and create a watertight seal. I've built a few WeatherBox enclosures since then with the channel filled with Marine Goop and they have all worked quite well.

To take pictures and video underwater with the 6 foot AMOS surfboard, an extension piece was required to get the WeatherBox below the waterline. The bow of the surfboard where the camera is located is pitched upward at about a 20 degree angle, so this requires a curved extension piece. The creation of this extension piece required a couple of weeks. At first, rendering the model in OpenSCAD took days for my laptop to finish, although later iterations of the model used some 2-D optimizations with extrusions that shortened the rendering time to about 24 hours. The first two model attempts also had small gaps on the side with the largest radius of curvature, which led to leaking. Eventually a working model of the curved extension piece was created:


The extension piece was fitted on AMOS and used to capture this underwater backyard pool video:

Apologies to viewers for the acting talent used in the above video. In Nature Robotics operates on a tight budget. 😉

Coming up next week is the final round of  the 2021 edition of the Ocean Startup Challenge (https://oceanstartupproject.ca/challenge/). In Nature Robotics is in the mix again this year, and will be pitching on Thursday, September 9. 


Wednesday, July 28, 2021

Drip, Drip, Drip, How to Make a Watertight Window?

 Some work has been done over the last couple of weeks on trying to adapt the WeatherBox to function as an underwater camera enclosure. This work has been educational but not entirely profitable. Some underwater tests had been done in the pool, and at the time appeared to be successful, but they were too short (less than 5 minutes) to really prove out the leak-worthiness of the enclosure.

A longer test in a real-world environment confirmed that the enclosure leaks too quickly to be of any use for underwater pictures or video. A slightly modified version of the enclosure with a longer stem was attached to the underside of AMOS and used to record a video frame every second, for a 1 hour test along the shoreline in Cap Brule, New Brunswick. The stem was not really long enough to keep the camera underwater all of the time, and the mounting pins inside this particular enclosure had snapped off, so the camera board was not properly centered. The camera software uses an auto-brightness adjustment, which I think was confused by the alternating views above and below the water. 

The camera ceased to function after about 20 minutes of operation. When the boat was taken out of the water about an hour later, it was half-full of sea water. The camera board was immediately rinsed and dried off, to no avail. A subsequent test confirmed that it no longer functioned at all. 

Some decent depth, temperature, and conductivity data was collected for the test, showing a nice correlation between the 3 parameters: the shallower water was warmer and had a higher measured conductivity.

 Conductivity

Depth

                                                                        Temperature

Here is a video created from stringing the individual 1 Hz video frames together and increasing the playback speed by 5x. Not much to see really, just a lot of bouncing up and down and the occasional piece of seaweed:


I'm going to test out some changes to the camera enclosure cap this week; at this point it looks like the weak point is the O-ring seal with the enclosure window. 


Tuesday, July 13, 2021

AMOS Goes Camping

This past weekend I went with my daughter to her triathlon training camp at Kejimkujik National Park in Nova Scotia. We purchased a campsite for two nights and brought the tent, her bike and other triathlon-related equipment, a kayak, and of course AMOS! While Kirsten practiced swimming, biking, and running, I figured I could test out AMOS and follow around in the kayak.

The weather on Friday turned out to be awful though. Tropical storm "Elsa" passed through the area late in the day with high gusting winds and buckets of rain. The fly on our camping tent kept nothing dry, as rain was easily blown underneath, so that by Friday evening, it was basically raining INSIDE the tent too. We  decided to put AMOS, the bike, and most of the other equipment in the tent, and ended up spending the night in the van instead. 

Fortunately the weather on Saturday was much better, and by noon it turned into a sunny hot day. While Kirsten was training around Merrimakedge Beach, I mostly kayaked and observed AMOS as it followed a pre-programmed sampling course. Unfortunately I had forgotten to bring a necessary cable for the depth sensor, but did manage to get some good conductivity and temperature data over a few hours:


 Over the last couple of weeks some progress has been made on the Android app for viewing AMOS and phone / tablet positions on an Esri / ArcGIS map: 


At present you can see the position of AMOS (yellow boat outline), and the position of the phone / tablet holder (white stick figure), but there is no data visible on the map yet, just some diagnostic information below the map.


Tuesday, June 15, 2021

New Brunswick Road Trips

 At the time of this writing, our home province of New Brunswick is closing in on its previously stated target of having given 75% of its populace at least one dose of a Covid-19 vaccine. The achievement of this target is supposed to lead to a loosening of restrictions, although I am not sure exactly what that means. Hopefully it will mean that we will be free to travel outside of the province sometime soon. In the meantime, AMOS has been busy traveling inside the province, doing demonstrations and collecting data. 

On June 03, AMOS was in Salisbury, doing a demonstration at some local wetlands. This was for a community project organized by high school students Daytona McMackin and and Rhianna Johnston. Amongst those in attendance were a grade 5 class from a  local elementary school, researchers from Mount Allison University, and members of the Petitcodiac Watershed Alliance

photo credit: Jennifer Colpitts, J Colpitts Photography
photo credit: Jennifer Colpitts, J Colpitts Photography


 photo credit: Jennifer Colpitts, J Colpitts Photography

photo credit: Jennifer Colpitts, J Colpitts Photography

photo credit: Jennifer Colpitts, J Colpitts Photography

The wetland area was fairly challenging in terms of its topography, with numerous grassy hillocks that required some careful route planning and / or manual driving to properly avoid. On a few occasions, these were not avoided, and AMOS became stuck, requiring a couple of outings in the kayak to nudge it into an area of deeper water. Apparently the demonstration was still suitably impressive for at least some of those in attendance: one grade 5 boy stated that he would ask his parents for an AMOS this year for Christmas. 😊

Here is the temperature and conductivity data collected with the AML Oceanographic probe:


The following week I took a trip back to the Lake Utopia area of New Brunswick, to sample Trout Lake, a small lake connected to the east end of Lake Utopia. The day was very hot and humid, and there seemed to be lots of fish (trout?) jumping out of the water to grab tasty flies. AMOS collected temperature, conductivity, and depth data over parts of the stream leading to the lake and the lake itself:

The above temperature data showed an interesting "cold zone" in the southeast corner of the lake where a stream emptied into it.


Much of the lake was quite shallow, although the middle area was a few m deep. 

This past week also included some software updates for both AMOS and the BoatCaptain PC software. It is now possible for customers to easily apply software updates to the AMOS boat by sending them through BoatCaptain. This should make it easy to add new features and improvements going forward. 


Tuesday, May 25, 2021

AMOS Goes Overseas


 The last couple of weeks have been quite busy getting the first commercial order for an AMOS Board Kit ready for shipment. The order came from South Korea, so the first order of business was trying to find a safe and legal way to ship the 12 V, 10 AH LiFePO4 (lithium iron phosphate) battery by air. This unfortunately consumed a number of days trying to contact local dangerous goods shippers, checking out dangerous goods shipping courses, and then trying to see if there might be some way to find the same (or a similar) battery locally. Eventually a local reseller of the same battery was found, but purchasing the battery required a Korean phone number (for security reasons?) which I did not possess. So the final solution was to simply give the customer a discount and recommend they buy the battery themselves from the local reseller. 

A stock unit was mostly ready for the sale, but a fish finder (for measuring depth) and solar panel needed to be added, and some extra wiring was required. These parts arrived after about a week and the wiring was completed, the magnetometer calibrated, and the unit made ready for testing just in time for the long weekend. We had made plans to go to my parents' cottage in Cap Brule for the long weekend, but could not get there until Saturday night. Sunday was rainy and very windy, with gusts up to 70 km/hr, so no testing could be performed that day. The following day was less windy (20 km/hr) but the cold waves outside the cottage were still a few feet high and smashing against the rocks. Not an ideal location to launch a small kids' foam surfboard. Fortunately the river in town in Shediac was more sheltered, so I took the boat over there. It went through a planned grid course very nicely, although the wind and current did blow it off course a little bit in the middle parts of the river: 


Unfortunately I had neglected to configure the software to record depth and temperature readings, so although the navigational capabilities of the kit were confirmed, the sensing functionalities were not. That's why things are tested before shipping right? We needed to leave soon to get home for a track and field practice, so the software was configured properly this time, and the boat taken over to a nearby lagoon for a quick test. The lagoon was quite shallow however, so although temperature and depth data were both collected, the depth readings were all 0.6 m, the minimum depth resolution of the transducer. The transducer was tested one final time back home in our pool to confirm that it gave readings between 0.6 m and 1.1 m as it was lowered and raised in the water. 

Last evening, some final software was setup to change the wireless module on the Pi to act as an access point. This was first tested out on a spare Pi to make sure that it did not render the unit "unconnectable". Fortunately it worked, and will be nice out in the field for sending and receiving large files. 

This morning was the final boxing up, which required a couple of hours for finding a suitable box, packing materials, and printing shipping labels. Here is the completed shipment, which Kelly kindly volunteered to wait in line (twice!) at the post office to deliver.